use of the sander
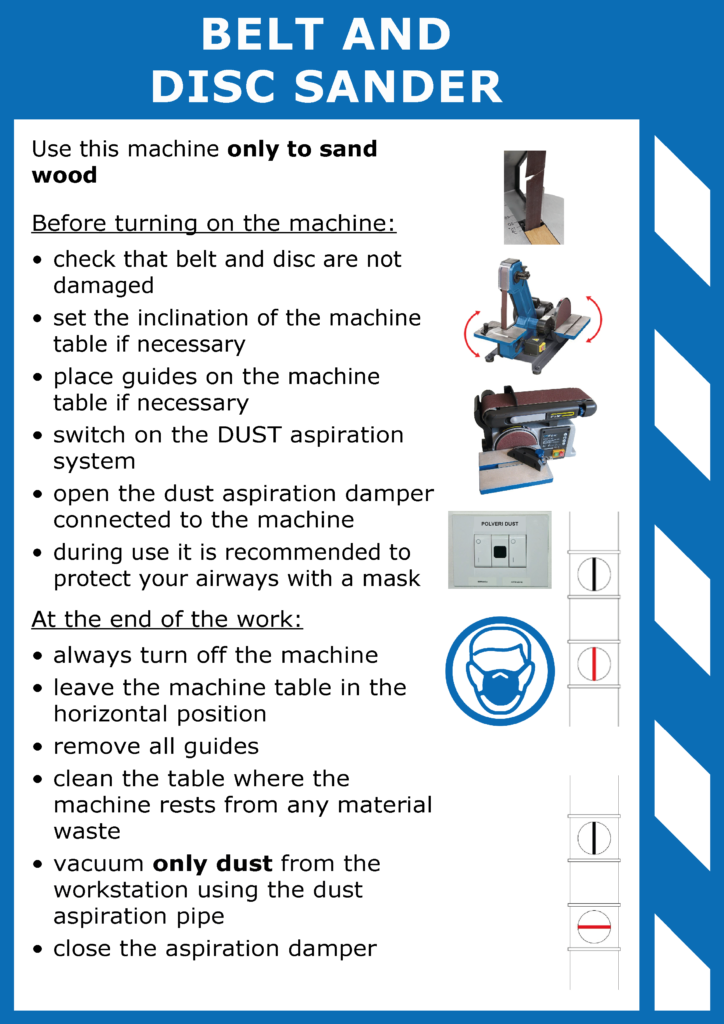
1. before starting the sander
Read carefully the signage displayed in the DRILLING lab.
Check the integrity of belt and disc. If necessary, change the standard layout of the sander by changing the inclination of the plane and/or fixing any guides.
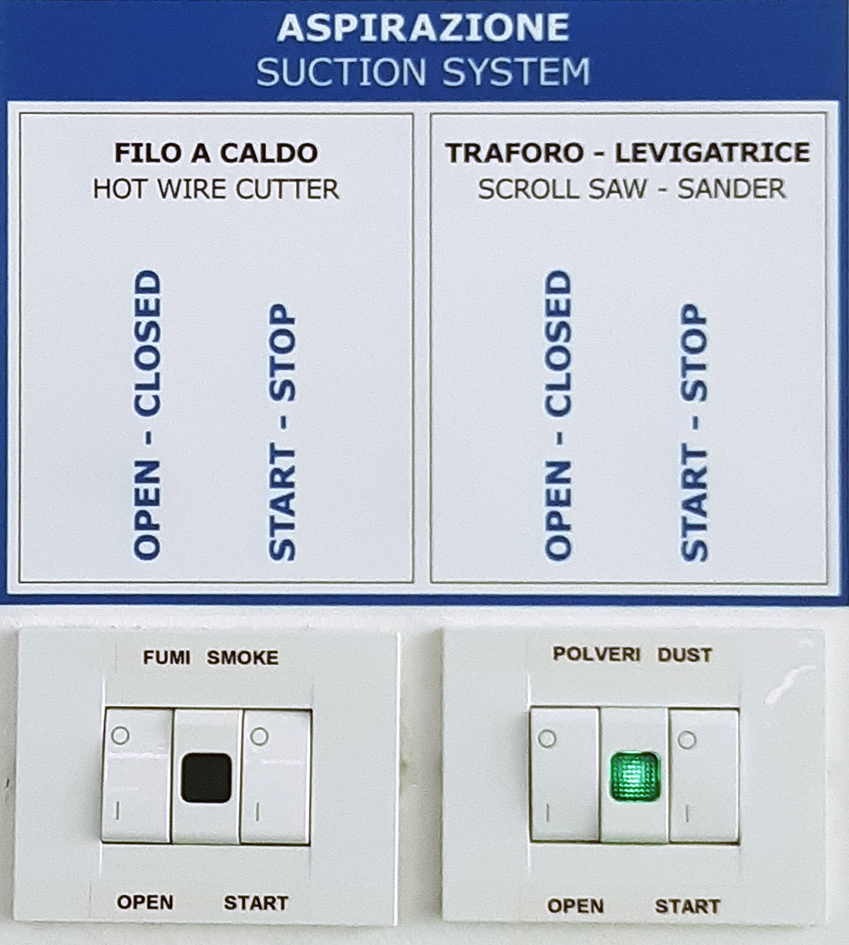
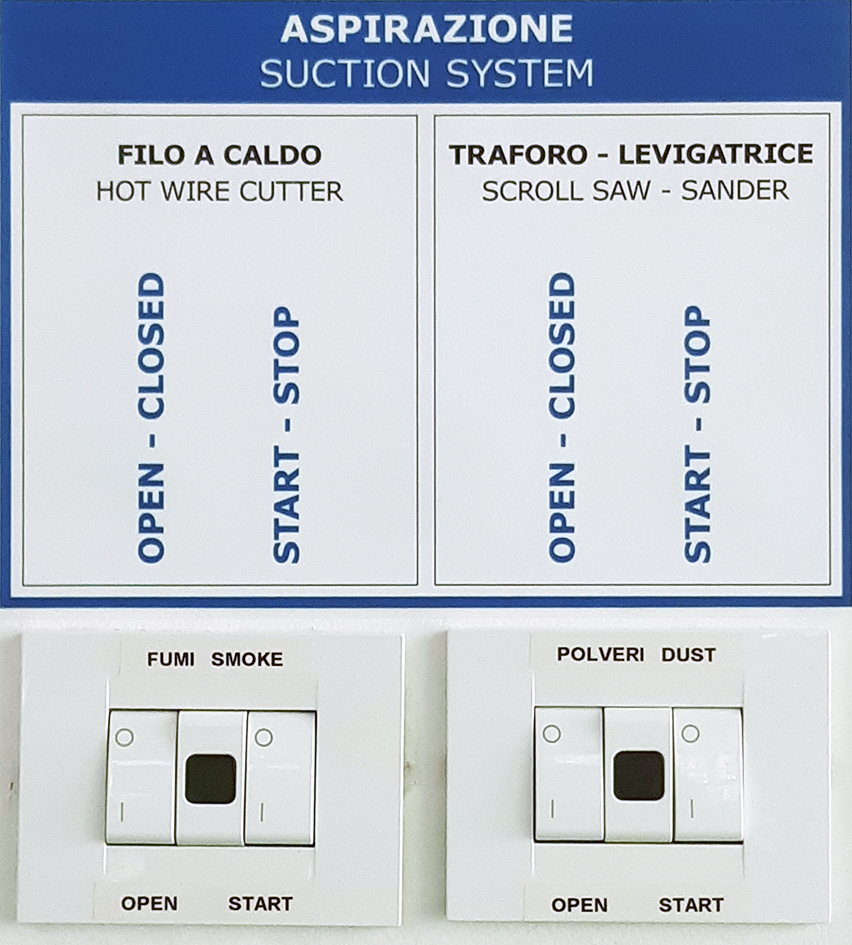
Turn on or verify that the dust extraction system is active: switches, OPEN and START, in position I and wait for the green light to turn on.
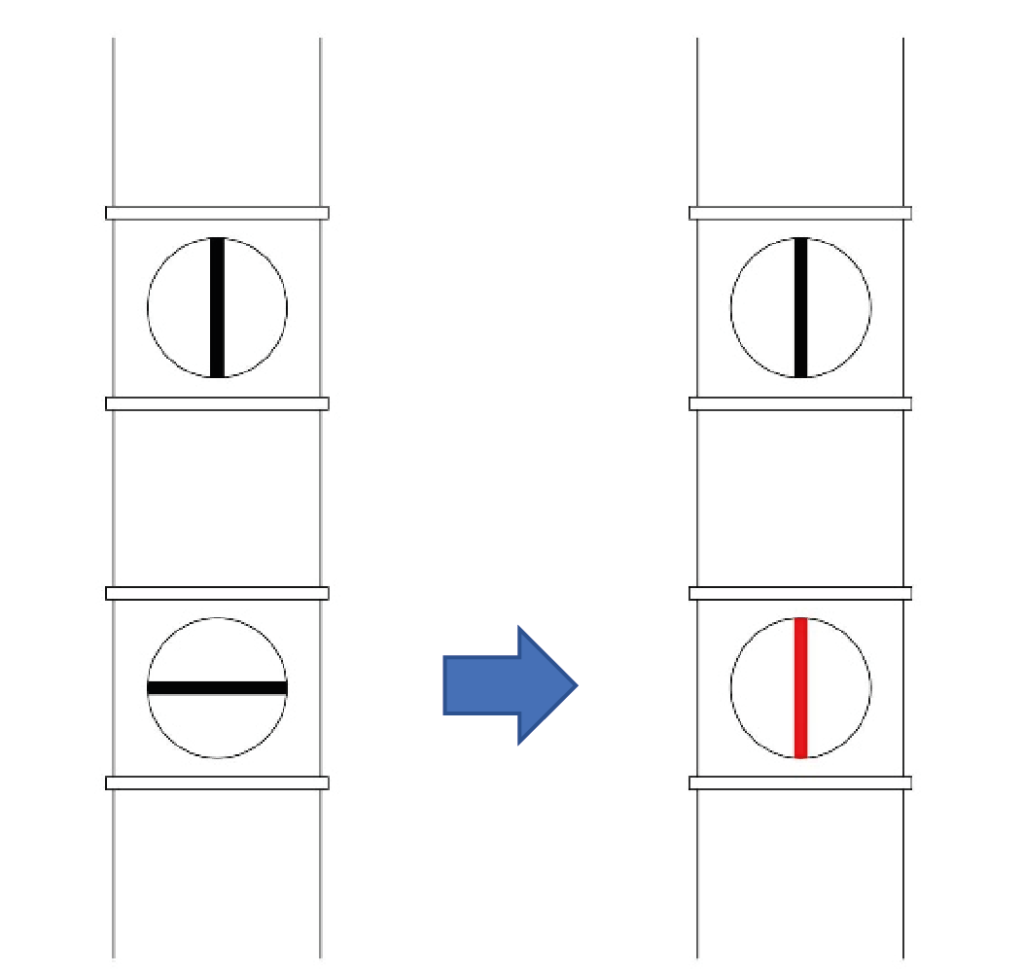
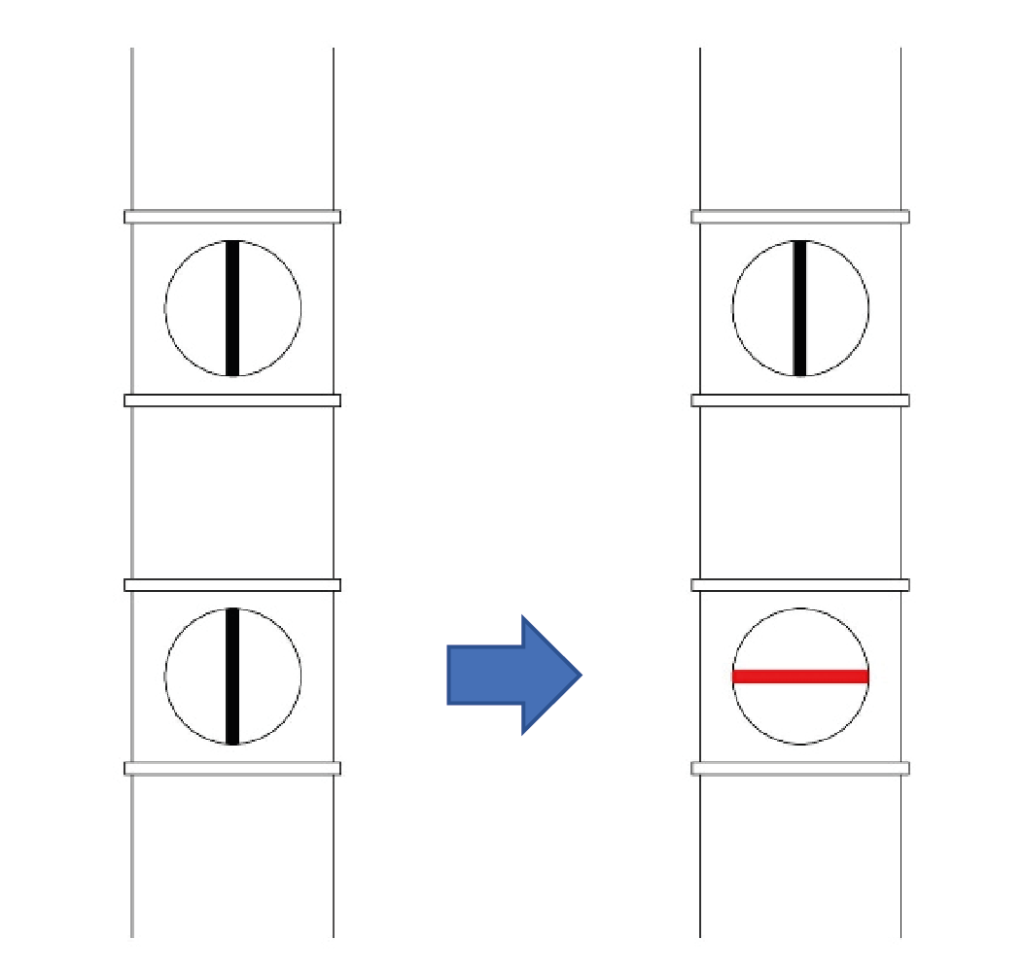
Open the lower damper, placed on the suction pipe, in correspondence of the machine that you intend to use, rotating it in vertical position.
The flexible suction pipe must be positioned in the rear part of the sander at the suction nozzle or near the machine surface, in order to intercept as much dust as possible.
2. ignition of the sander
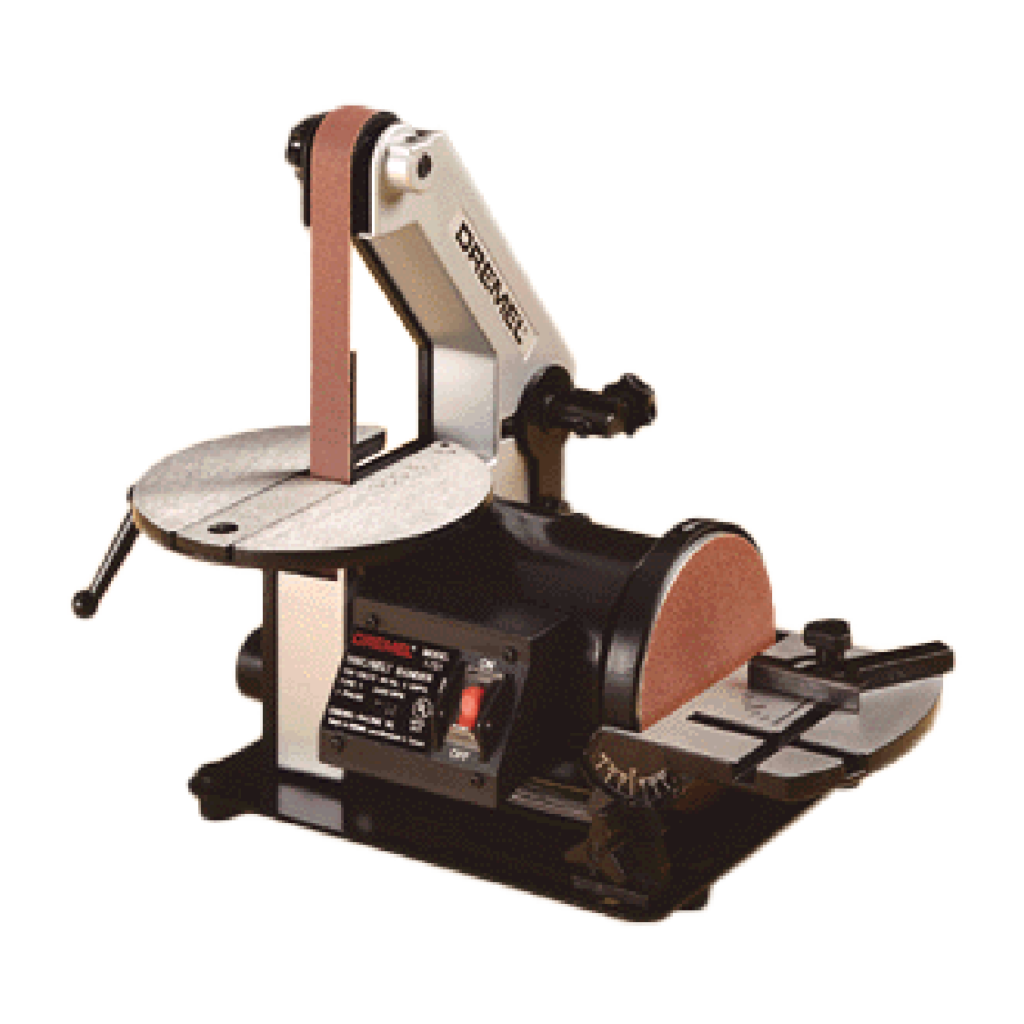
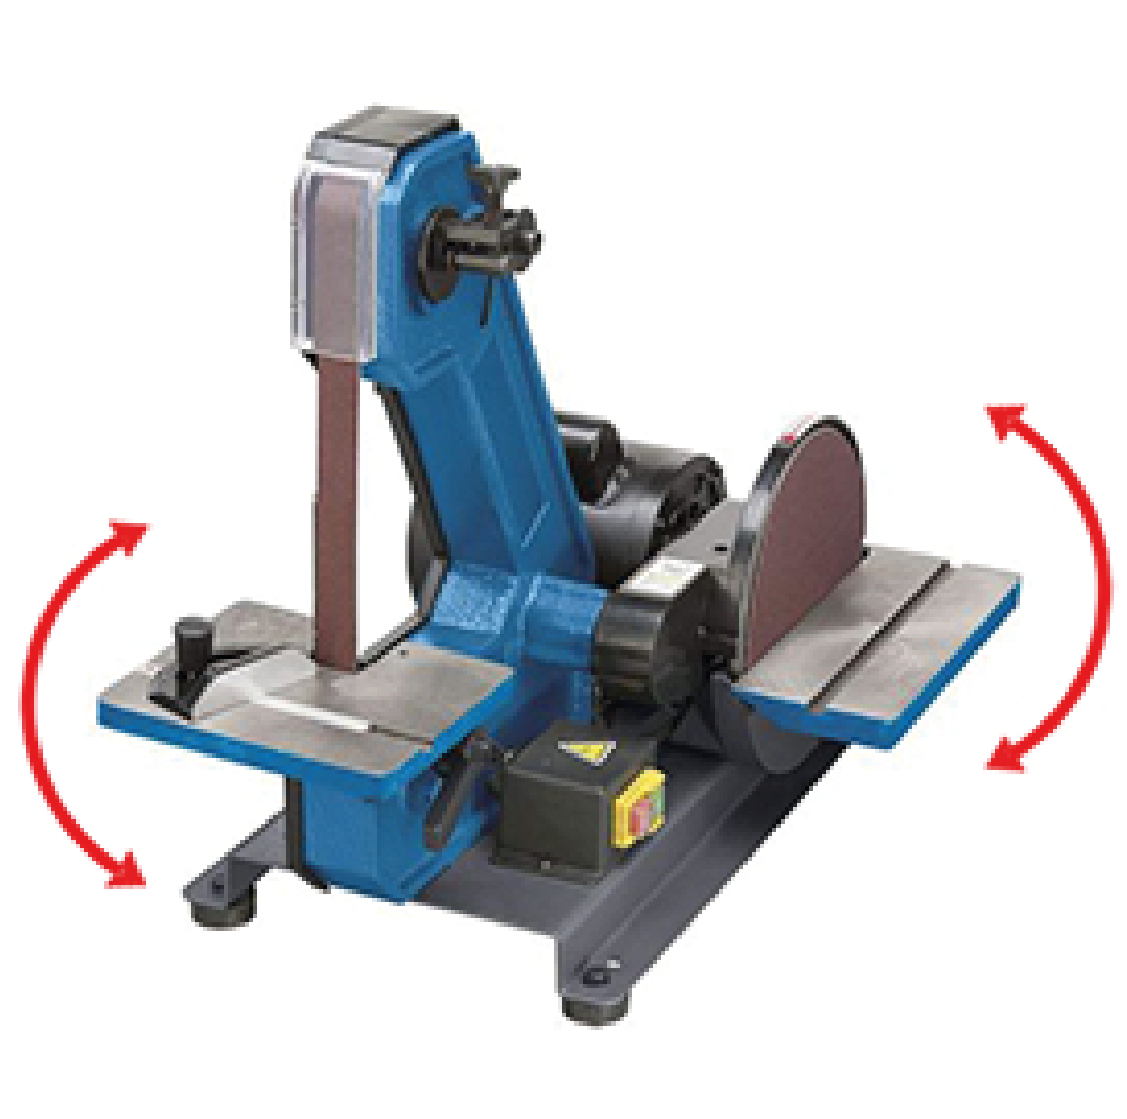
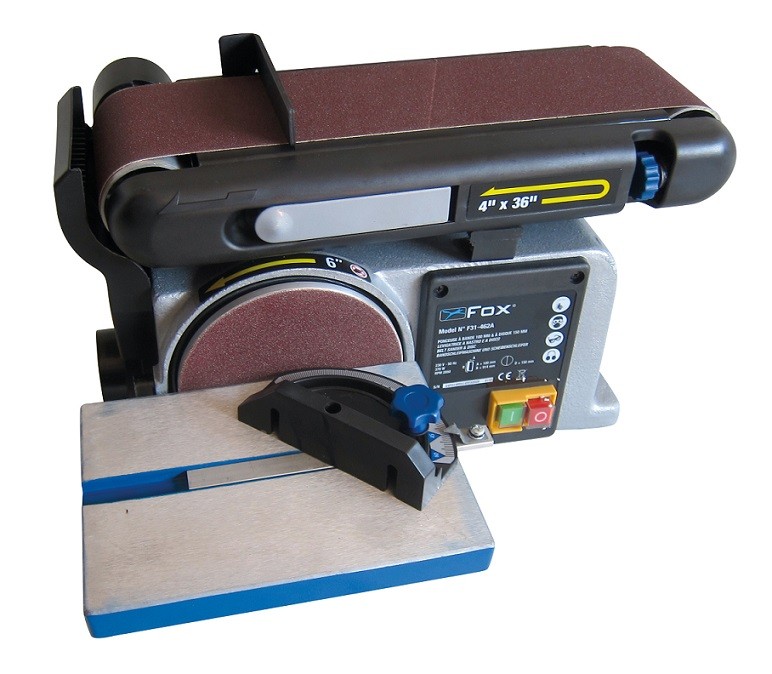
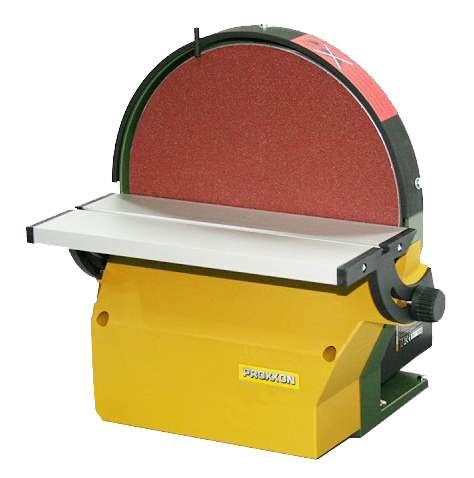
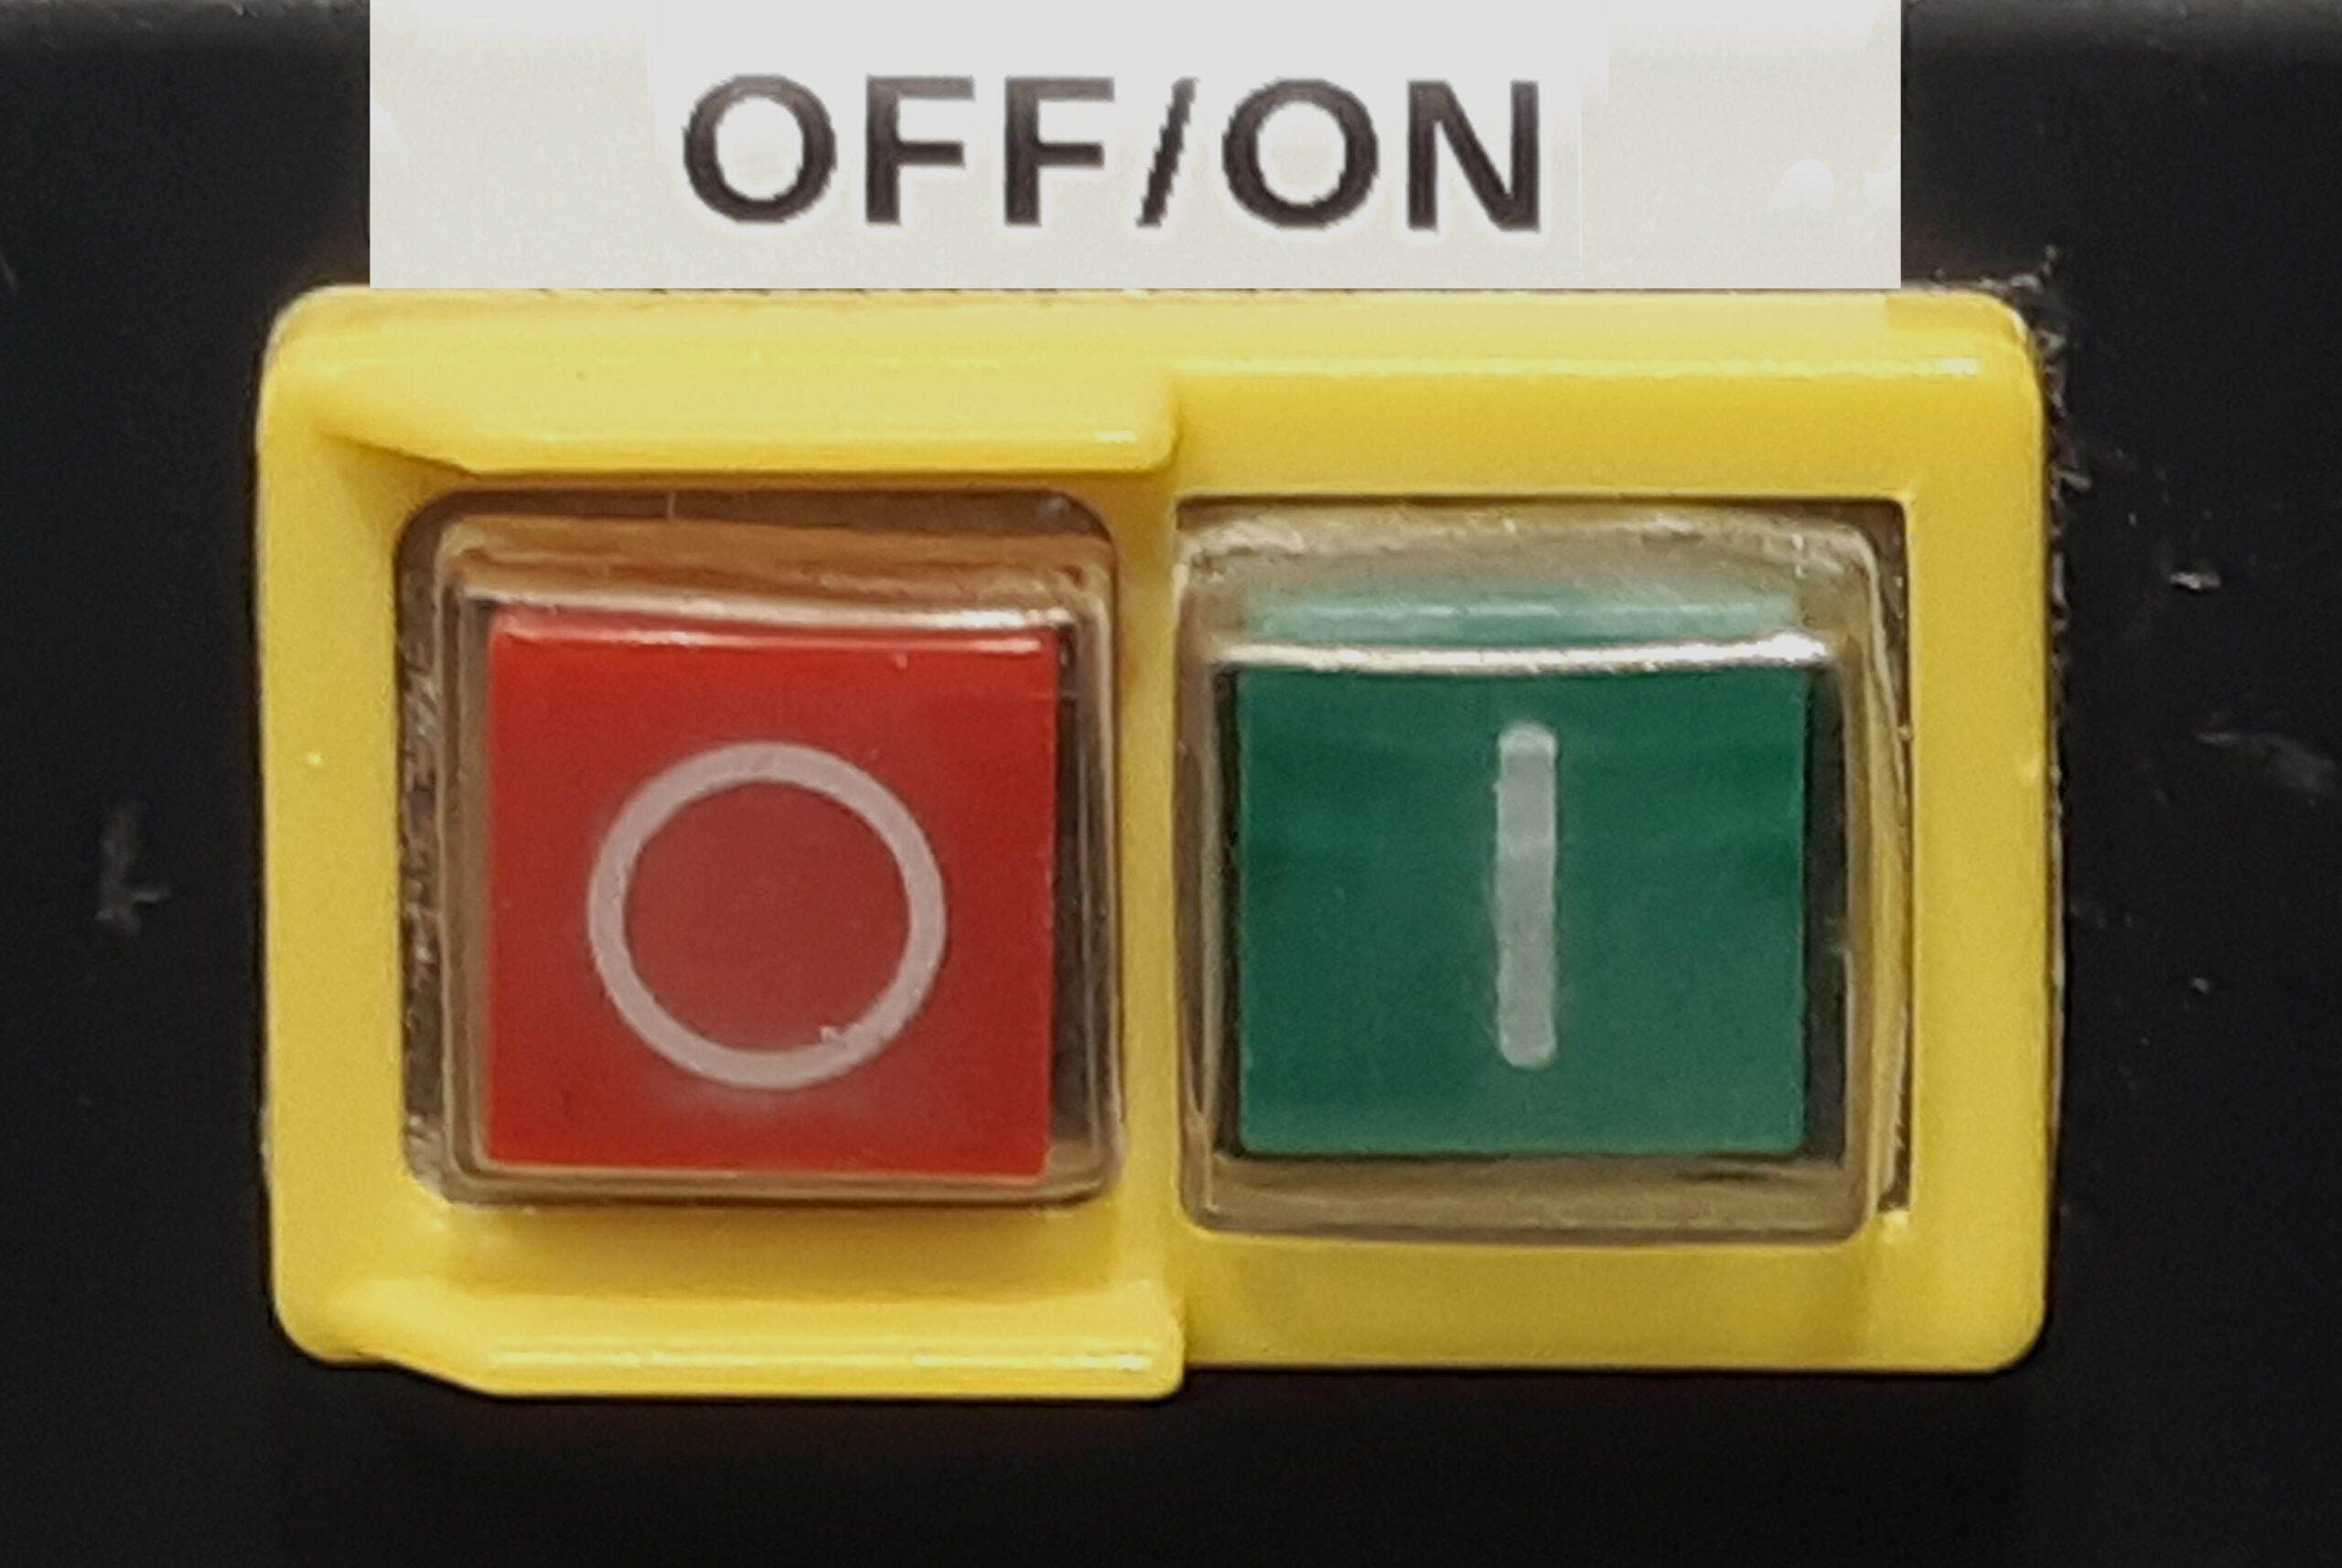
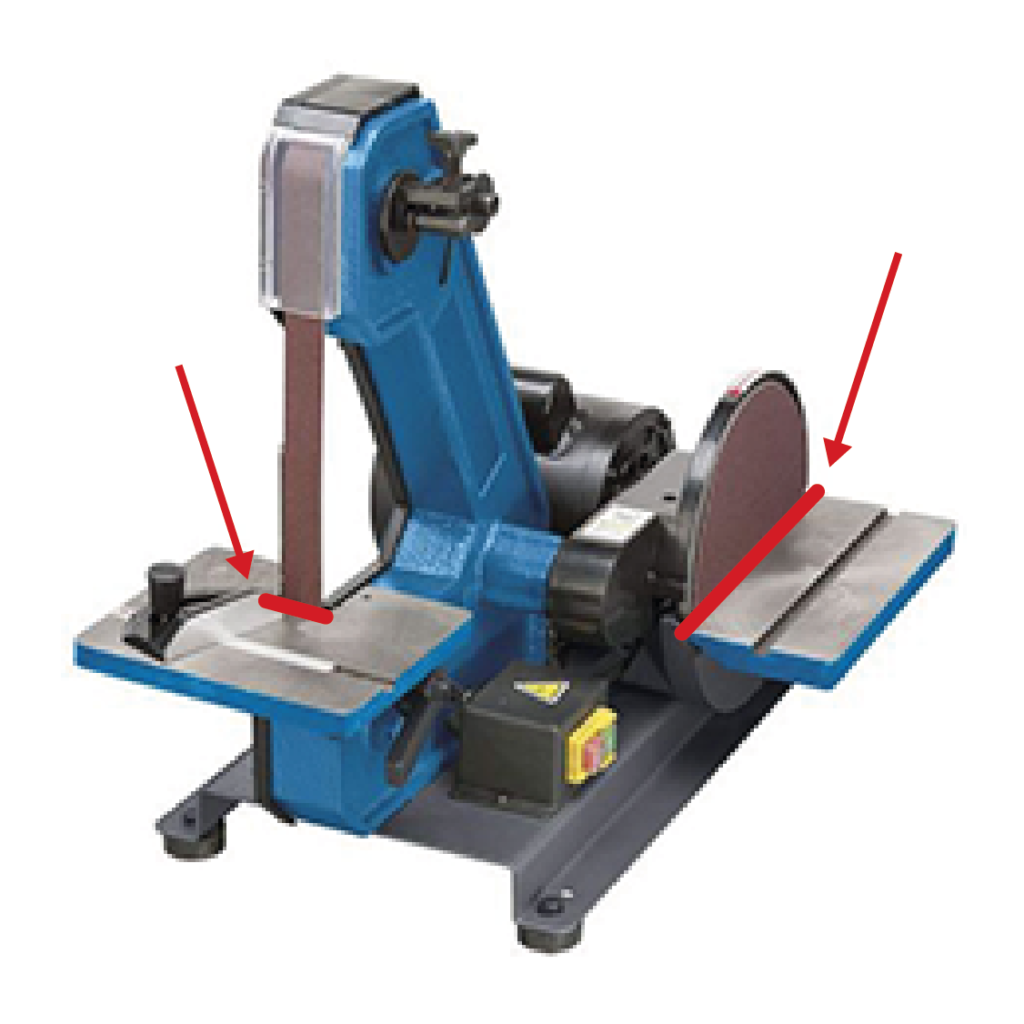
To operate the sander, press the ON/OFF (I/O) switch on the front (Dremel sander) or on the right (Fervi sander) side of the machine. Pressing the switch sets both the front belt and the side disc in motion.

3. sanding of wood and wood-based materials
The sander is normally used for finishing pieces made of wood or wood derivatives such as: plywood, multilayer wood, chipboard and MDF. Place the workpiece to be sanded on the worktable and, keeping it firmly on the worktable, push it lightly until it comes into contact with the belt or disc. The pressure exerted must be light to avoid burning the workpiece, belt breakage or excessive disc wear. To facilitate sanding and avoid burn marks, always move the workpiece slightly from right to left and vice versa against the abrasive. There is always a gap between the work tables and the belt or disc, which can be particularly dangerous if you accidentally put your fingers in it.
The use of the belt is suitable for finishing internal corners.
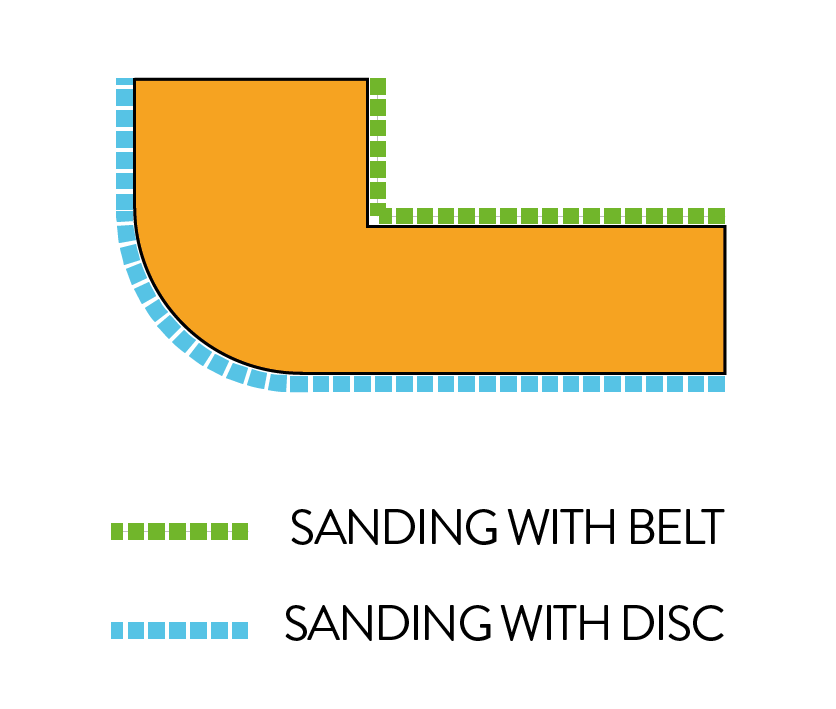
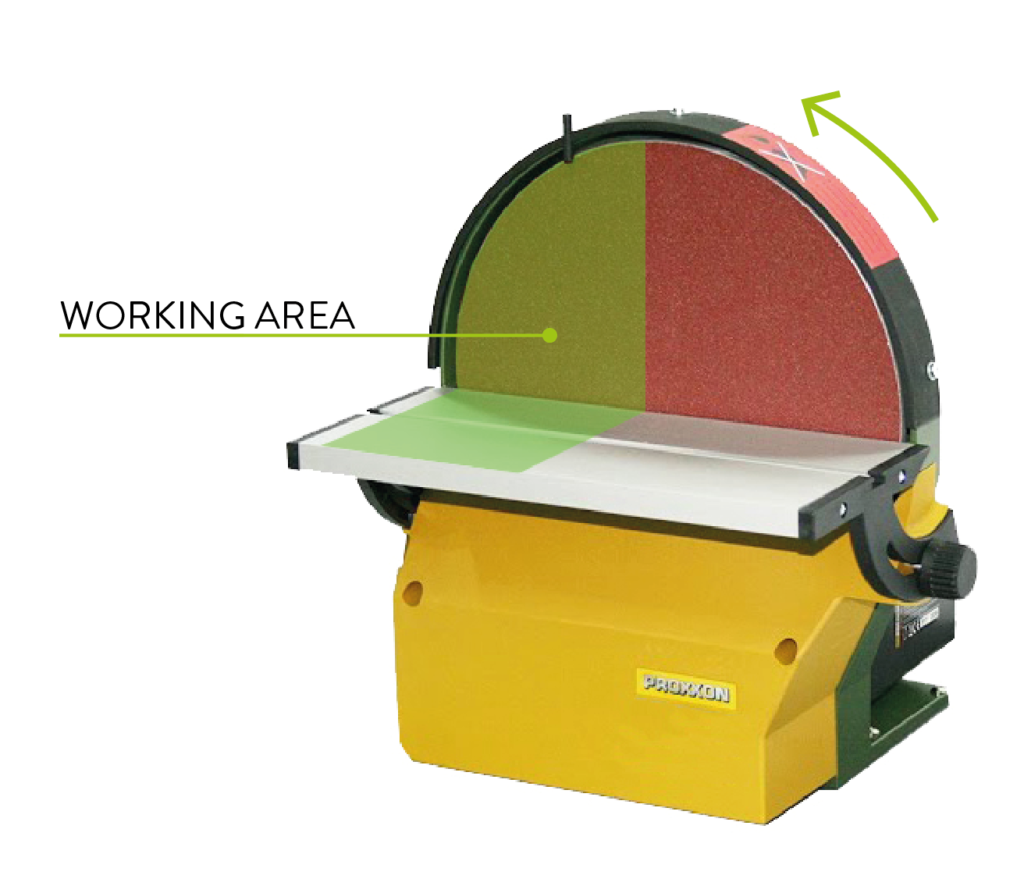
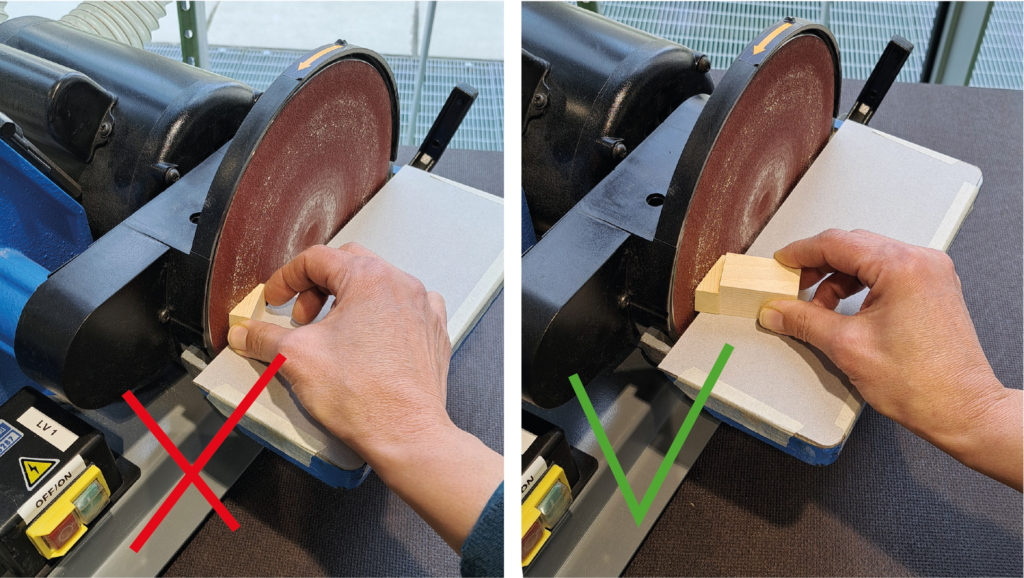
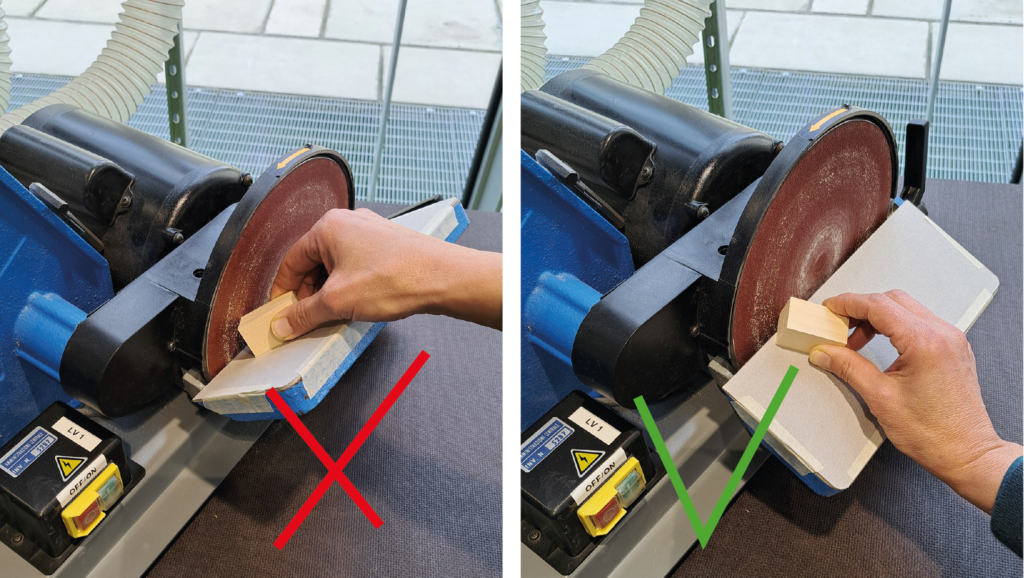
The use of the disc is suitable for finishing external corners. The disc rotates anti-clockwise, so it should only be used in the left-hand half. From the centre to the right can be dangerous, as the rotating movement of the disc causes the workpiece to be lifted upwards.
For sanding operations other than 90°, it is possible to adjust the inclination of the worktables by means of the appropriate levers.
4. at the end of work
SANDER SHUTDOWN: Press the switch in the OFF position and never move away from the workstation leaving the machine running.
RESTORING THE STANDARD CONFIGURATION: Leave the sander worktop in horizontal position and remove any guides.
CLEANING OF THE WORKSPACE: remove the wood waste and throw them in the appropriate container; using the flexible pipe, aspirate the residual dust on the sander and in the surrounding area.
SUCTION INTERRUPTION: close the lower damper, placed on the suction pipe, in correspondence of the machine that has been used, rotating it in horizontal position.
SWITCHING OFF THE DUST ASPIRATION SYSTEM: set the two dust extraction OPEN and START switches back to position O.
LEAVE THE SYSTEM ON IF OTHER SCROLL SAWS OR SANDING MACHINES ARE IN OPERATION.
helpful tips
The sander is a machine that is used for finishing workpieces, not for producing them: use the scroll saw to cut workpieces at a maximum distance of 1 mm from the perimeter to minimise sanding.
For safe sanding of small workpieces, it is necessary to minimise the distance between the table and the belt/disc by covering the work tables with approximately 2 mm cardboard, so that the covering adheres to the belt/disk. It may also be necessary to mount them with double-sided tape on extensions, so that you can sand safely without getting your fingers close to the abrasive.
If it is necessary to use angle guides on the worktables, request them from the staff, who will also provide guidance on their safe use.
In disc sanding, although it is possible to tilt the table upwards, it is suggested to tilt it ONLY downwards, in order to avoid dangers deriving from dragging and possible blocking of the workpiece between the work table and the disc.
Bear in mind that in disc sanding the speed of rotation increases as you move away from the centre; this results in more material being removed towards the circumference of the disc.
with the sander it is possible to cut
- solid soft wood such as: obece, dried linden and balsa, up to a maximum thickness of 50 mm;
- solid hardwood such as: walnut, beech and mahogany, up to a maximum thickness of 30 mm;
- mdf panels up to a maximum thickness of 30 mm;
- plywood panels up to a thickness of 20 mm;
- sheet plastics such as: forex, methacrylate and polycarbonate up to a thickness of 10 mm;
- profiles for modelling in: wood, plastics, aluminium, brass and copper.
it is not possible to cut
- expanded plastic materials;
- profiles and plates of steel and ferrous metals;
- sheets of glass, plaster, cement and stone.
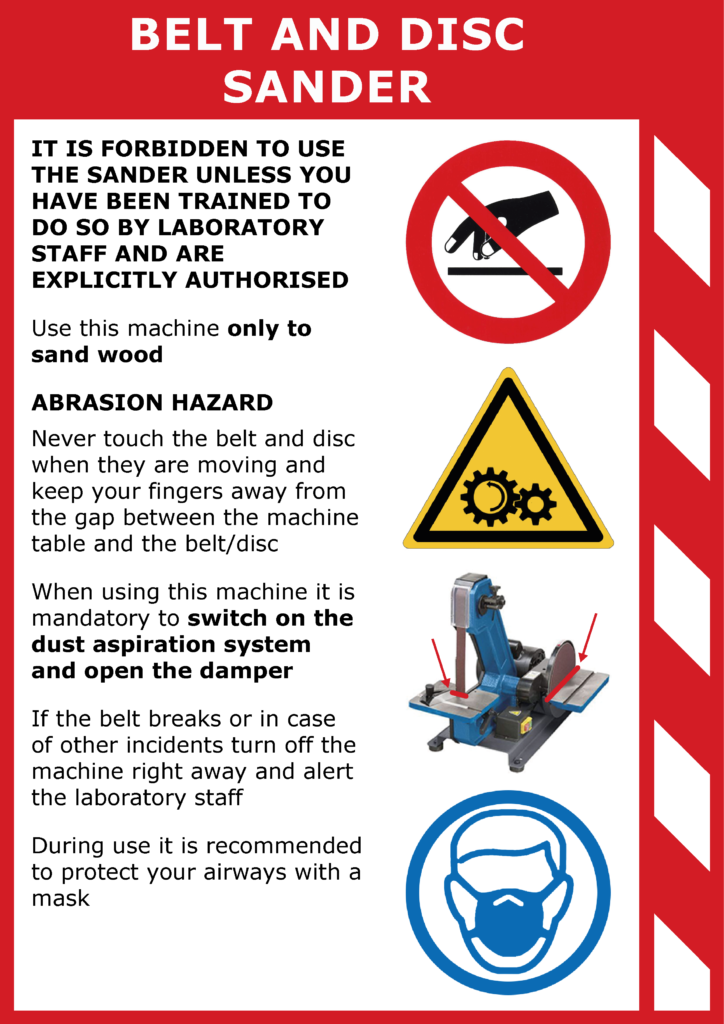
prohibitions and prescriptions